Setting up Telepath
About five minutes, in two parts
There are two halves to this, and both are needed: you add our bot to your Telegram Business account, then you connect Telepath in your assistant. Doing only the first is the most common mistake — Telegram will look connected while your assistant still sees nothing.
Telegram Premium is required. Chatbots live under Telegram Business, which is a Premium feature — there is no way around it, and it is Telegram's subscription, not ours.
Part 1 — Telegram
Add the bot to your Business account
Open Telegram Business
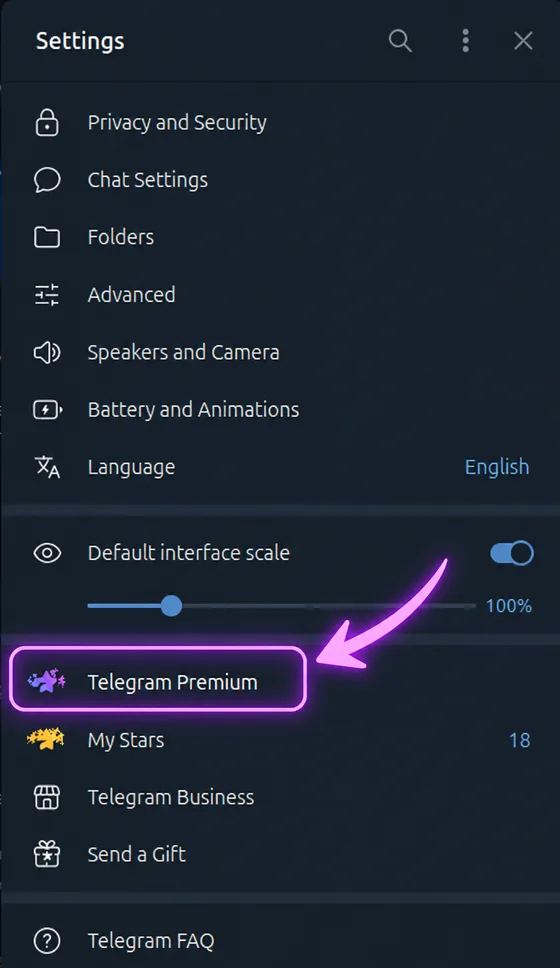
In Telegram, go to Settings and open Telegram Business. If you do not see it, you are not on Premium yet — that is the entry just above it.
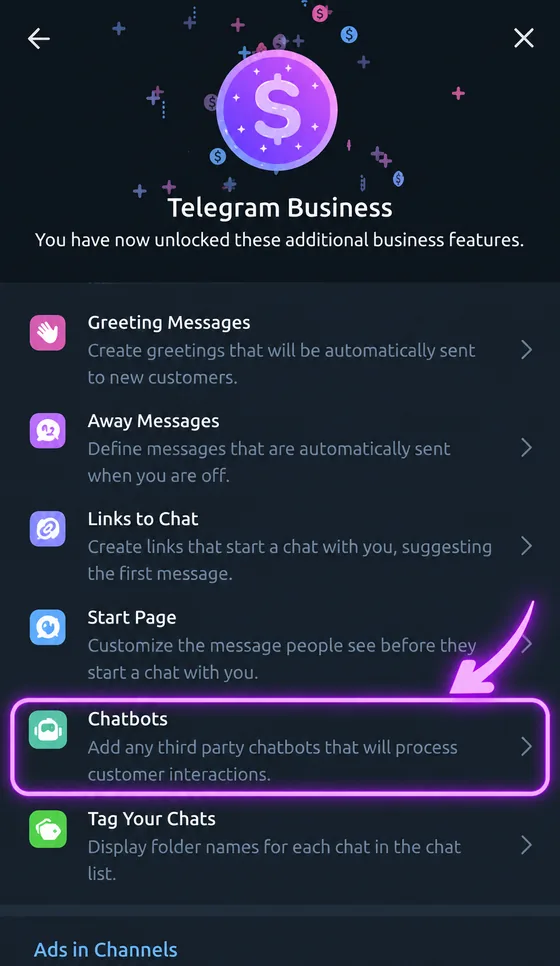
Go to Chatbots
Inside Telegram Business, choose Chatbots — "add any third party chatbots that will process customer interactions".
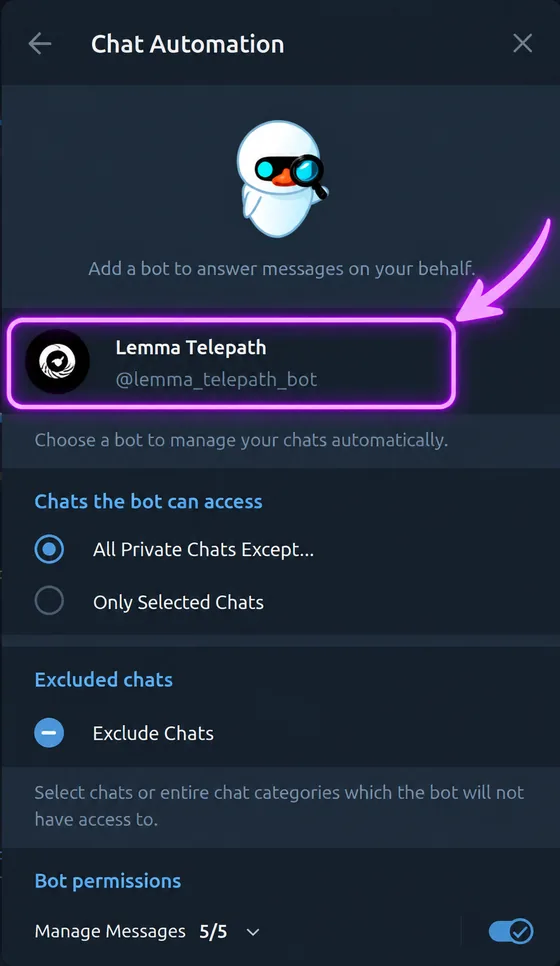
Add @lemma_telepath_bot
Type or paste the bot's username. Then choose which conversations it may see: all private chats, or only the ones you pick. You can also exclude individual chats or whole categories — anything you exclude is never sent to us at all.
Turn on Reply to Messages
Open Bot permissions → Manage Messages and make sure Reply to Messages is ticked. Without it the assistant can read your chats but every attempt to answer will fail — this is the single most common thing people miss.
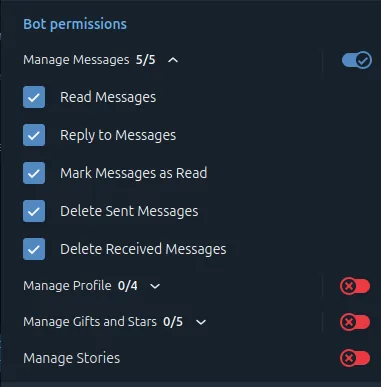
Telepath only uses the message permissions. Manage Profile, Manage Gifts and Stars and Manage Stories can all stay off — we never touch them, and leaving them off costs you nothing.
The bot will message you in Telegram to confirm the connection. From that moment your new 1:1 business messages are archived into an account that is yours alone. Nothing that happened before is imported unless you ask for it.
Part 2 — your assistant
Connect the side that reads it
Telegram now feeds your archive, but nothing can read it yet. Pick where your assistant lives — the archive is the same either way, and connecting more than one is fine.
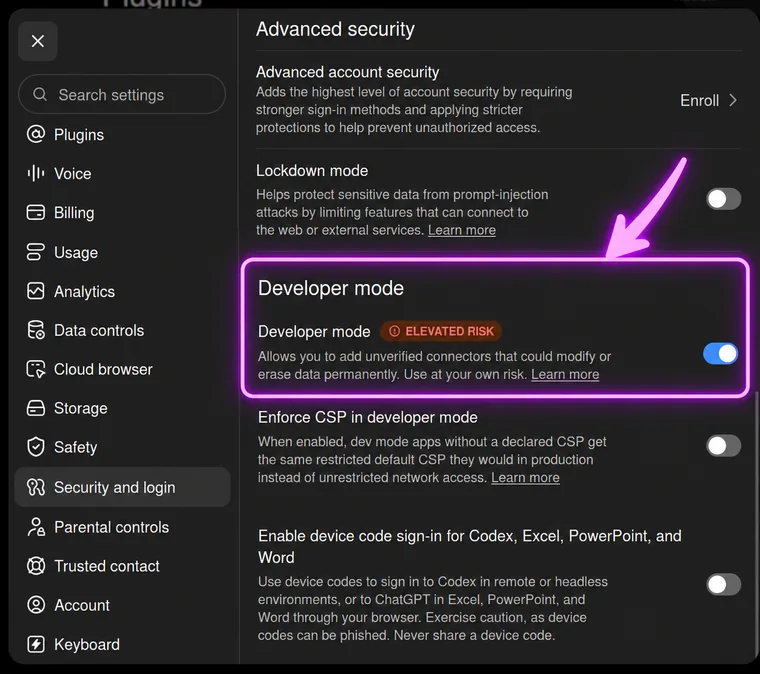
Turn on Developer Mode
In ChatGPT open Settings → Security and login and switch on Developer mode. It is what lets you add a connector that is not yet in the public directory.
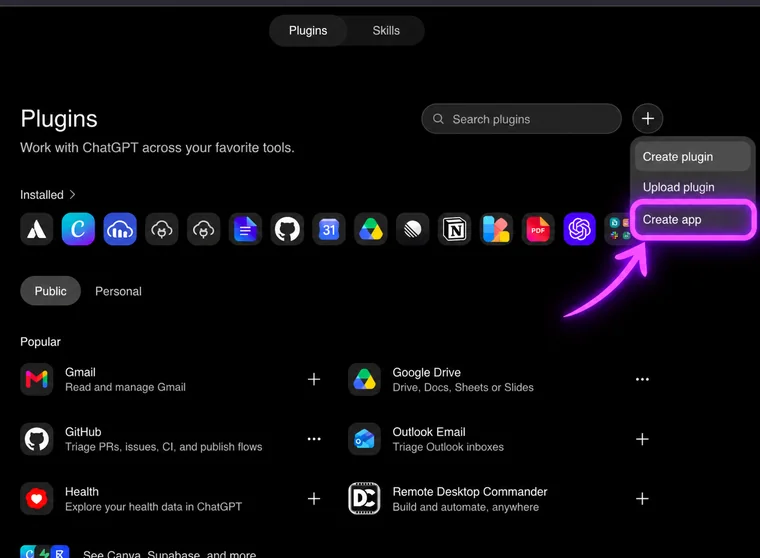
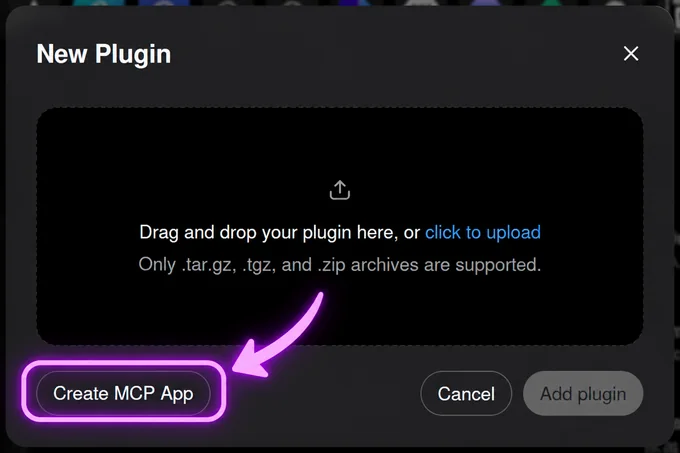
Create the app
Go to chatgpt.com/plugins, press + in the top right and choose Create app. In the window that opens, ignore the upload area and press Create MCP App — Telepath is a server, not a file.
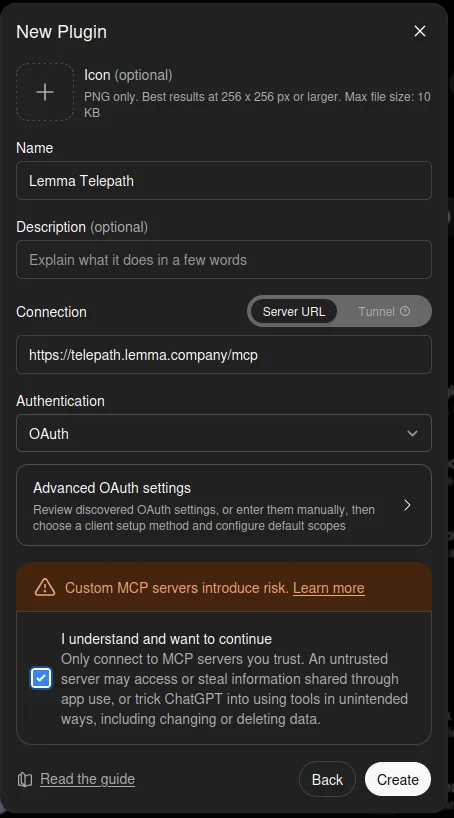
Fill in the server
Four things, and the icon is optional:
- Name —
Lemma Telepath, or whatever you prefer to see in the sidebar. - Connection — keep Server URL and paste
https://telepath.lemma.company/mcp - Authentication — OAuth. Leave the advanced settings alone; they are discovered automatically.
- Tick I understand and want to continue, then press Create.
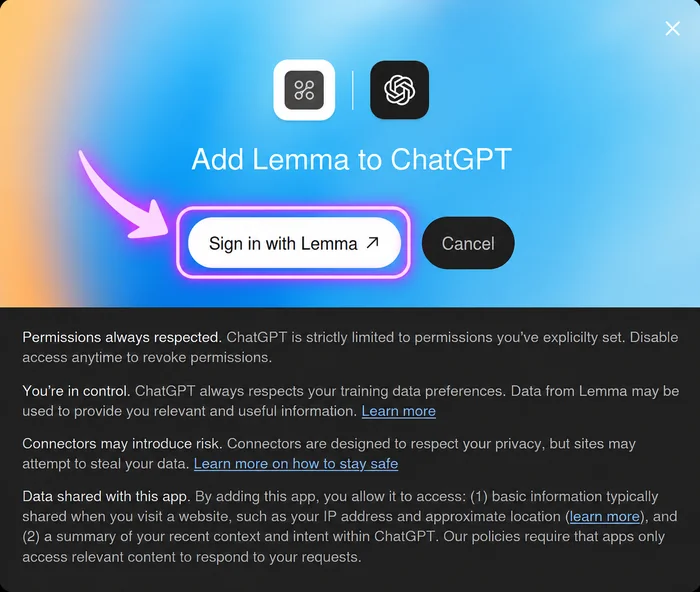
Sign in with Lemma
ChatGPT asks to connect. Press Sign in with Lemma — this is the OAuth handshake, and it opens our page.
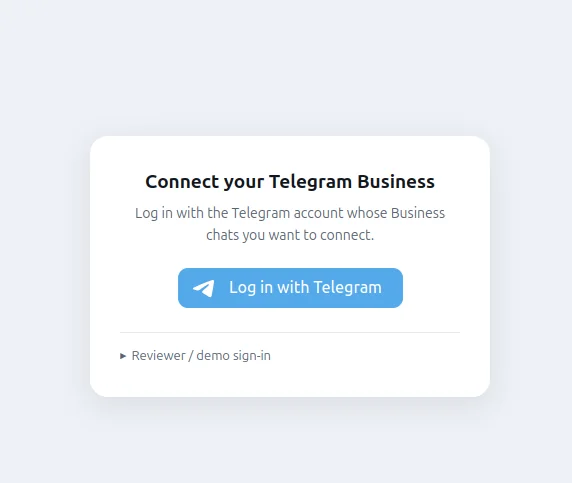
Log in with Telegram
Our page opens. Press Log in with Telegram and use the same account you connected in Part 1 — that is what tells us which archive is yours. There is no password to invent.
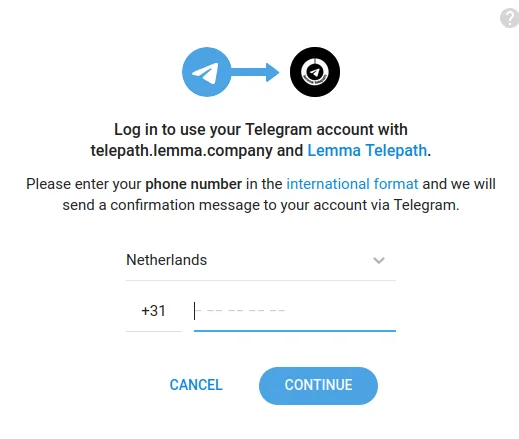
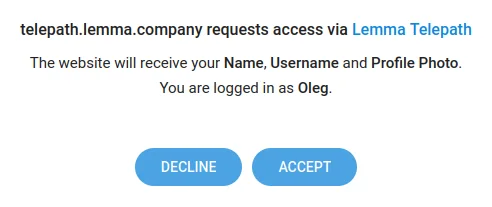
Telegram then asks for your phone number in international format and sends a confirmation to your account. Confirm it in the Telegram app, then press Accept, and finally Log in as <your name>.
Try it
Ask your assistant something real:
- “Show me my most recent Telegram chats.”
- “Find the message where we agreed the invoice amount.”
- “Summarise what I missed today.”
If it answers with your actual conversations, you are done.
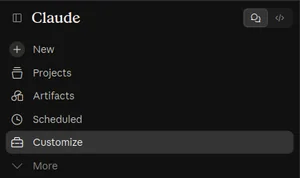
Open Customize
In the Claude sidebar choose Customize, then the Connectors tab — or go straight to claude.ai/customize/connectors.
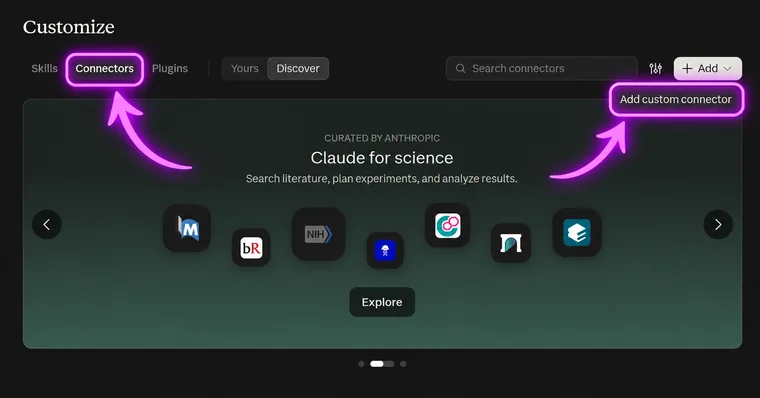
Add custom connector
Press Add in the top right and choose Add custom connector.
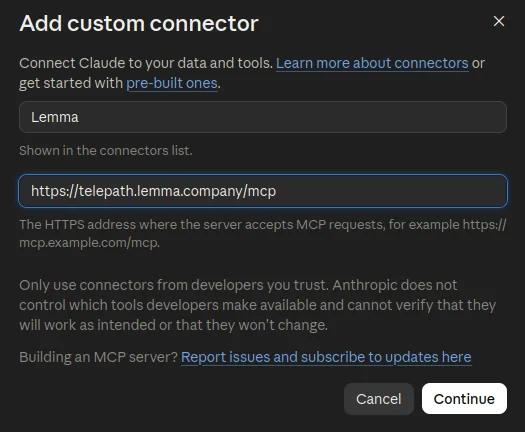
Name it and paste the server
Any name you like, then the address:
https://telepath.lemma.company/mcp
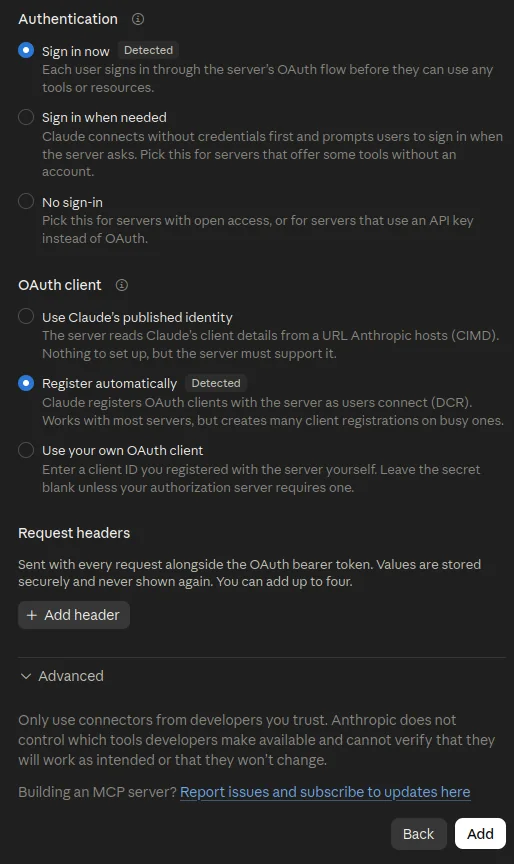
Leave the auth settings alone
Claude reads our OAuth configuration and fills this in: Sign in now and Register automatically both come up marked Detected. Nothing to change — press Add.
Press Connect
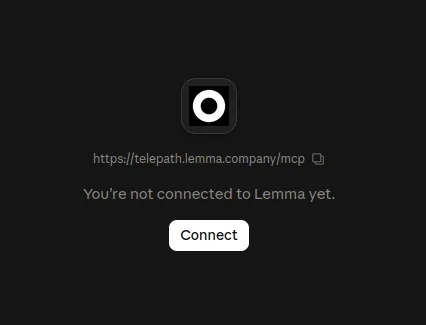
Claude shows the connector as not yet connected. Press Connect — that starts the same OAuth flow as everywhere else.
Log in with Telegram
Our page opens. Press Log in with Telegram and use the same account you connected in Part 1 — that is what tells us which archive is yours. There is no password to invent.
Telegram asks for your phone number in international format and sends a confirmation to your account. Confirm it in the Telegram app, then press Accept, and finally Log in as <your name>.
Then ask it: “Show me my most recent Telegram chats.”
Grok takes a custom MCP connector as it is — no developer mode, no approval.
Open Plugins
In the Grok sidebar at grok.com choose Plugins. Anything you connect lands in that same list.

New Connector
On the Connectors tab, press New Connector — top right, next to the search box.
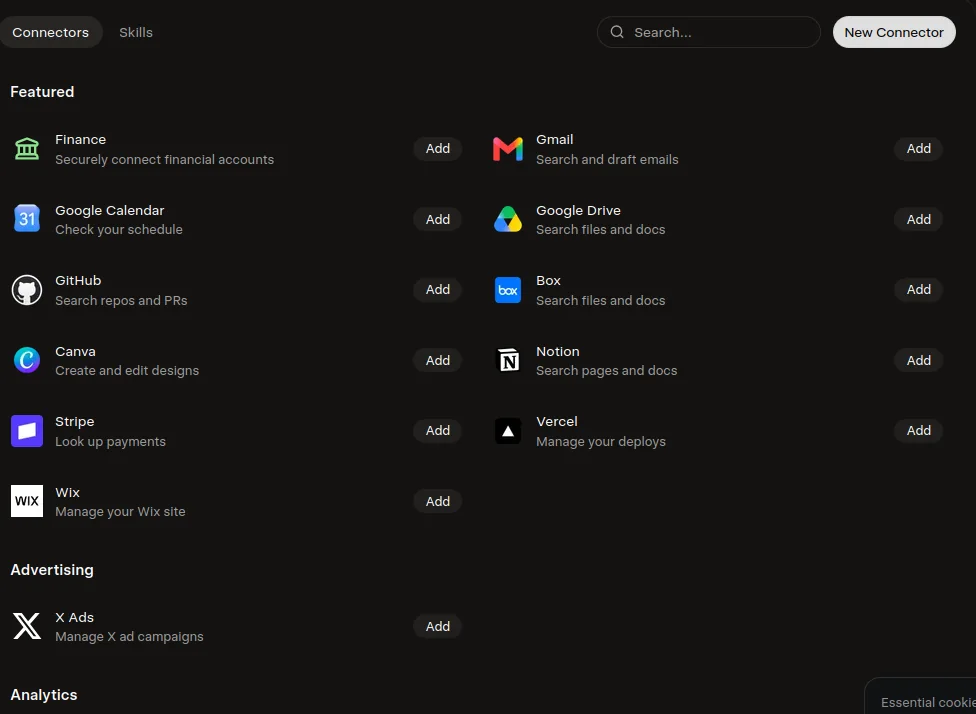
Choose Custom
The list that opens is the built-in catalogue. Telepath is not in it — take the first entry, Custom.
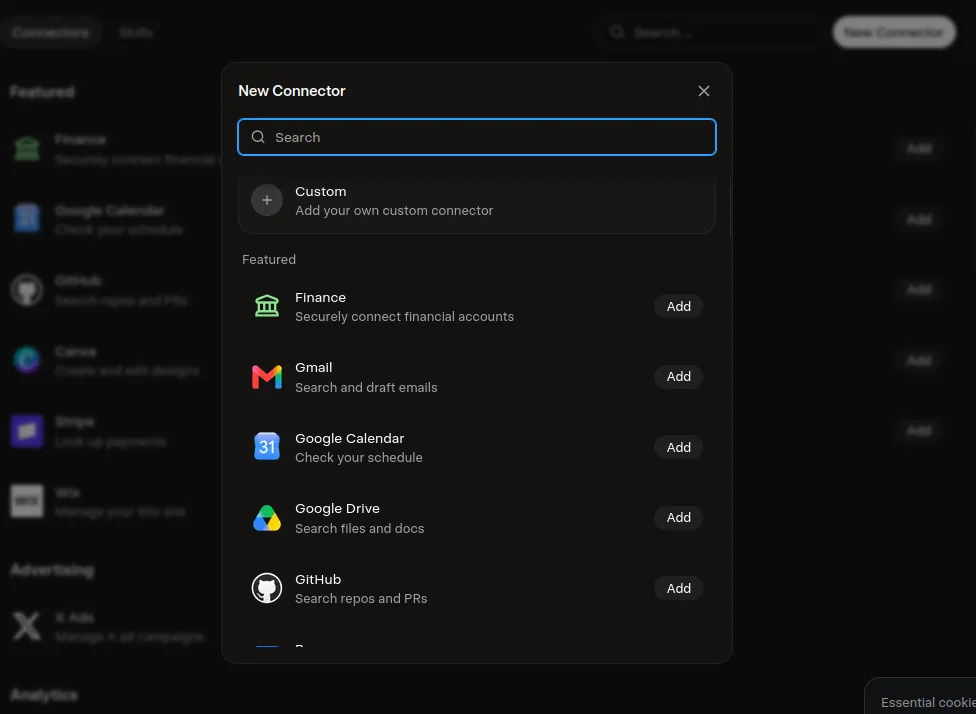
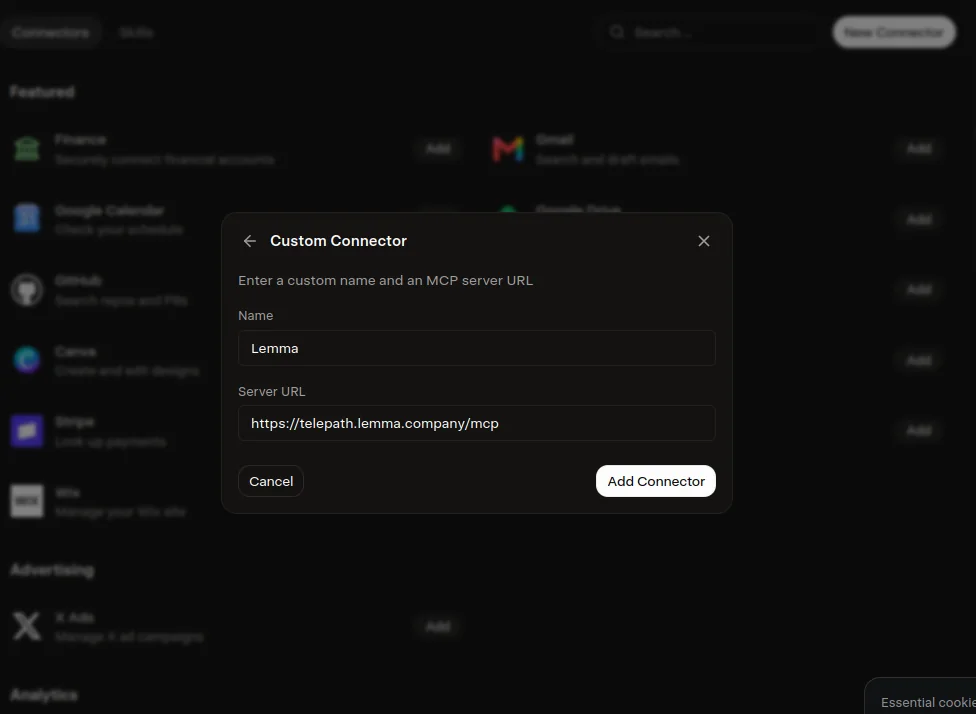
Name it and paste the server
Any name you like, then the address:
https://telepath.lemma.company/mcp
Press Add Connector.
Log in with Telegram
The same handshake as everywhere else: our page opens, press Log in with Telegram and use the same account you connected in Part 1. There is no password to invent.
Then ask it: “Show me my most recent Telegram chats.”
Codex, Claude Code, Cursor and anything else that speaks MCP. There is no settings screen — you tell the agent, and it wires itself up.
Give it this
Paste it as-is. Any MCP-capable agent has everything it needs here:
In Claude Code you can also add it directly: claude mcp add --transport http telepath https://telepath.lemma.company/mcp, then /mcp to sign in.
Finish the login in a browser
The agent cannot log in for you: it hands you a URL, you open it, press Log in with Telegram and confirm — the same account as Part 1. The agent picks up the token once you are done.
Check it sees the tools
Ask it to list its tools. You should see the telegram_* and kb_* set — searching, reading messages and files, and, if you granted it, replying.
After that
Everything else is optional, and lives in the bot's own chat:
/settings— switch individual capabilities on and off. Replies, media, notes and group archiving are each a toggle you control./import— backfill older history from a Telegram Desktop export. The bot only sees messages sent after it was connected, so this is how you bring in the past. How →/subscribe— transcription of voice and round-video messages. You get 30 minutes free to try it./deletedata— erase everything we hold for you, immediately.
Importing your old history — the full walkthrough
The bot starts seeing messages the moment you connect it, and cannot look further back — Telegram simply doesn't offer that. An export fills in what came before.
Importing is on the Plus and Pro plans, since it is a one-off bulk job rather than everyday traffic.
Open Advanced in Telegram Desktop
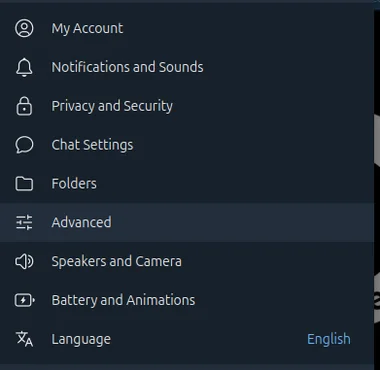
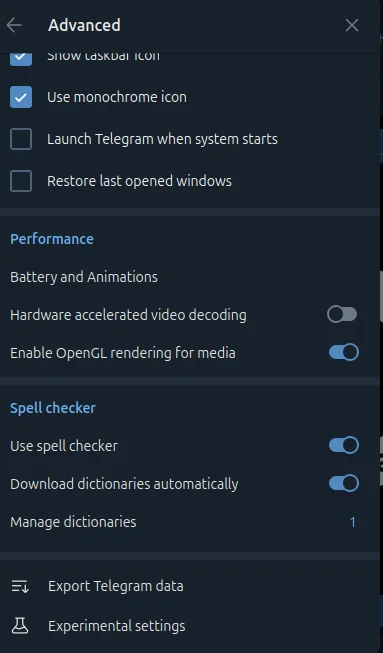
This lives in the desktop app only — the phone app has no export. Settings → Advanced, then Export Telegram data at the very bottom.
Untick all the media
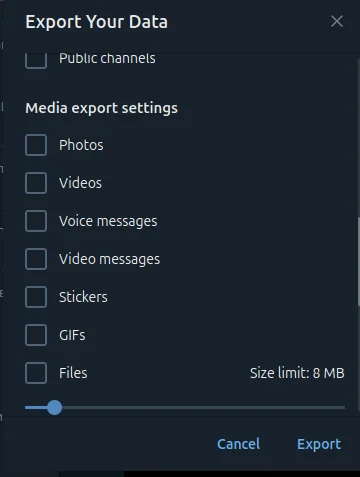
Photos, videos, voice messages, stickers, files — none of it is needed. We import the text and the structure of your conversations, not the files, and leaving these on turns a small export into tens of gigabytes.
Choose Machine-readable JSON
At the bottom, under Location and format. This is the one setting that must be right — HTML cannot be imported, and picking it means exporting all over again.
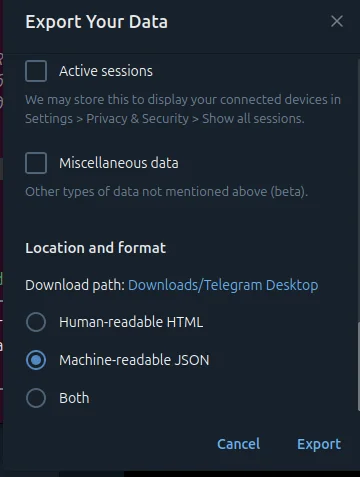
Telegram then prepares the file. A long history can take a while, and Telegram may make you wait before it starts.
Send it to the bot
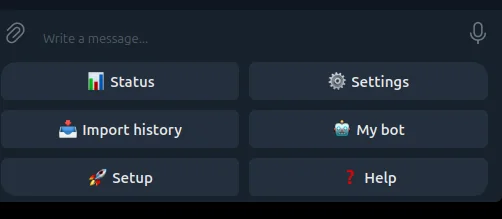
In the bot press 📥 Import history (or send /import). It replies with a one-time link that is private to you. Open it and drop in result.json from the export folder.
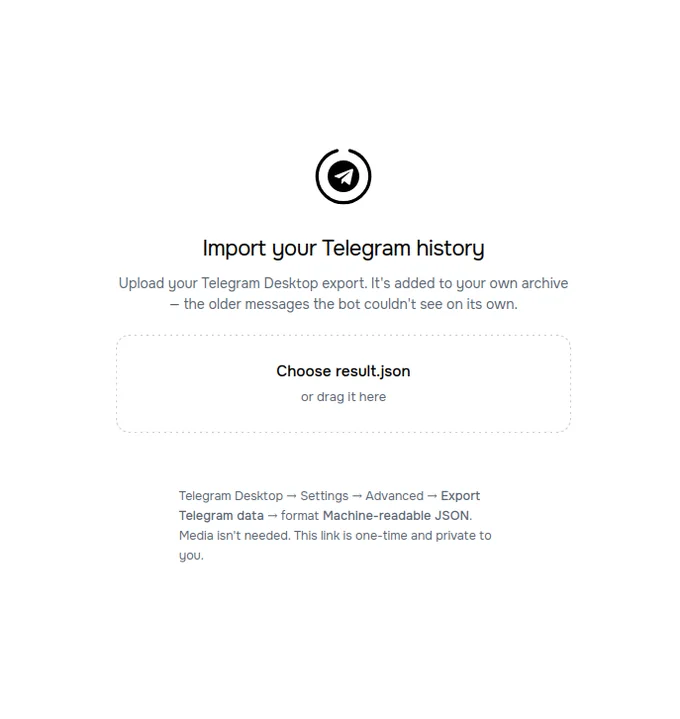
Wait for it to finish — the bot messages you a receipt with how many messages went in.
What people ask
- Will it overwrite what I already have? No. Messages are matched on chat and message id, and anything already there is left alone — a live message always wins over the same message from an export. Importing the same file twice changes nothing.
- Can I import just one chat? Yes. Right-click the chat in Telegram Desktop → Export chat history, same JSON format. Both a single chat and a whole-account export are accepted.
- What about groups? They import too, and their ids are converted so they line up with live traffic instead of producing duplicates.
- Will the voice messages be transcribed? No. An export carries no file Telegram can still hand us, so imported voice stays as it is. Transcription works on new messages.
- How big can it be? Up to 600 MB, which is far more than a text-only export needs — without media even years of chats stay modest.
- Is the link safe? It is single-use, expires in about 30 minutes, and belongs to you alone — the bot already knows who you are, so there is nothing to log in to.
If something does not work
- The assistant says it has no connection. Part 2 was not completed — adding the bot in Telegram is not enough on its own.
- It can read but not reply. Reply to Messages is off in the bot's permissions (step 4). Telegram also only allows a business bot to write to someone within 24 hours of their last message to you.
- A chat is missing. It may be excluded in step 3, or the messages predate the connection — see
/import.
Still stuck? Write to hello@lemma.company or see Support.